Windows 10 Black Screen After Login is among the most common issues faced by Windows 10 users on their system. There are lots of ways by which you can fix this black screen after login Windows 10 issue and different forums/websites out there recommend different methods in order to get the problem resolved. So let’s check out everything about the Windows 10 Black Screen After Login article.
If you too are facing the Windows 10 black screen after login issue and want a quick resolution, then in this black screen after login Windows 10 article we have compiled a list of the easiest and 100% working solutions for the issue. Now let’s get to know more about this Windows 10 Black Screen After Login guide.
How to Fix Windows 10 Black Screen After Login Error Problem
So here we are showing you all the methods and solutions for fixing and solving this type of Windows 10 Black Screen after Login Error Issue from your Devices permanently. So just check it out,
1. Check if your Windows 10 Device is Still Active

The most probable reason as to why you are suddenly seeing a Windows 10 black screen after login might be due to your display suddenly becoming unresponsive.
To check whether your Windows 10 system is still active and responsive, press the Windows key + Shift key + Ctrl key + “B” key. Once you press all the keys at once, you will be able to hear a “BEEP” sound and your display with either dim or quickly blink in order to refresh the display.
In case you are using a tablet powered by Windows 10, then instead of the key sequence mentioned above, you can also press the Volume Down + Volume Up buttons at once in order to initiate the “BEEP” sound and display refresh.
2. Check if your Windows 10 Device is Projecting to a Different Screen
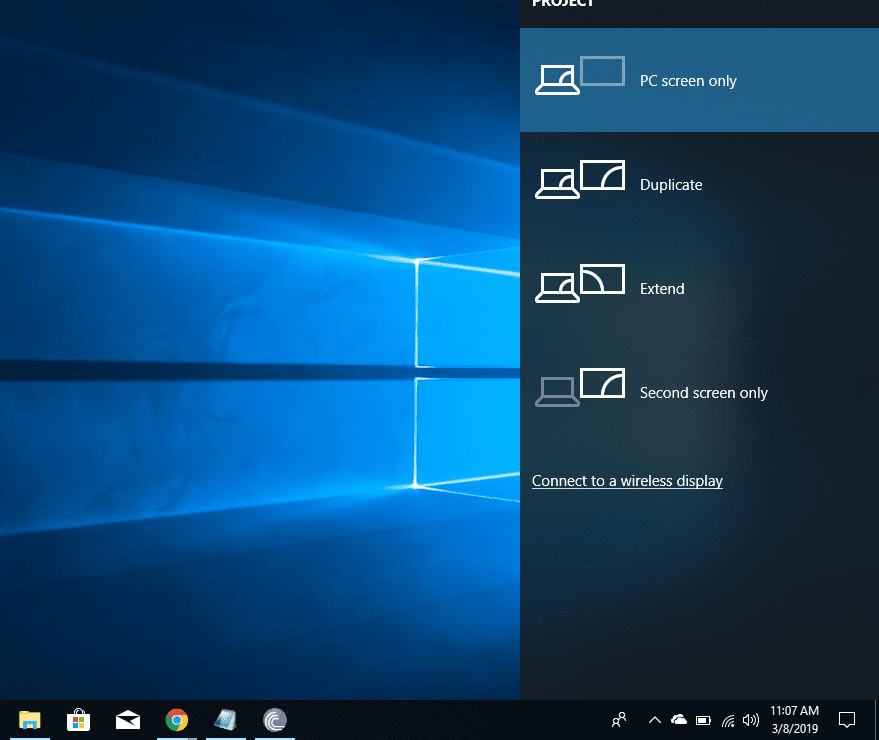
If you earlier projected to a secondary display or projector from your Windows 10 system and then forgot to switch back to your system’s main display to view content, then that might be the reason why you are experiencing the Windows 10 Black Screen after Login issue.
In this case, you need to change the setting so as to project content to your main display only.
To do the same, press the Windows key + “P” key on your keyboard and from the menu that appears, select the option that says “PC Screen Only”. This should resolve the error you are facing.
3. Restart Windows Explorer on your System
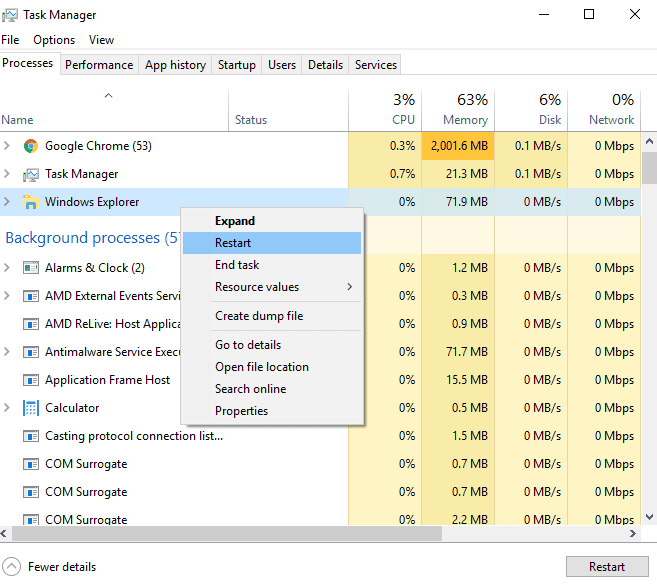
Another method to fix the Windows 10 Black Screen after Login issue is to restart the Windows Explorer task on your Windows 10 system. Please keep in mind that you can only follow this method if you are facing the cursor displayed on the screen along with parts of the display itself.
Below are the steps you need to follow in order to restart Windows Explorer:
- Press the Delete key + Alt key + Ctrl key on your keyboard.
- From the menu that appears, click on “Task Manager”.
- A new task manager window will now open.
- Switch to the “Process” tab.
- Within this tab, find the “Windows Explorer” process. Using your mouse, right-click on this option.
- A drop-down menu will now appear and from this menu, click on “Restart”.
The Windows Explorer task will restart on your system, and this should resolve the Windows 10 Black Screen after Login issue.
4. Restart Your System
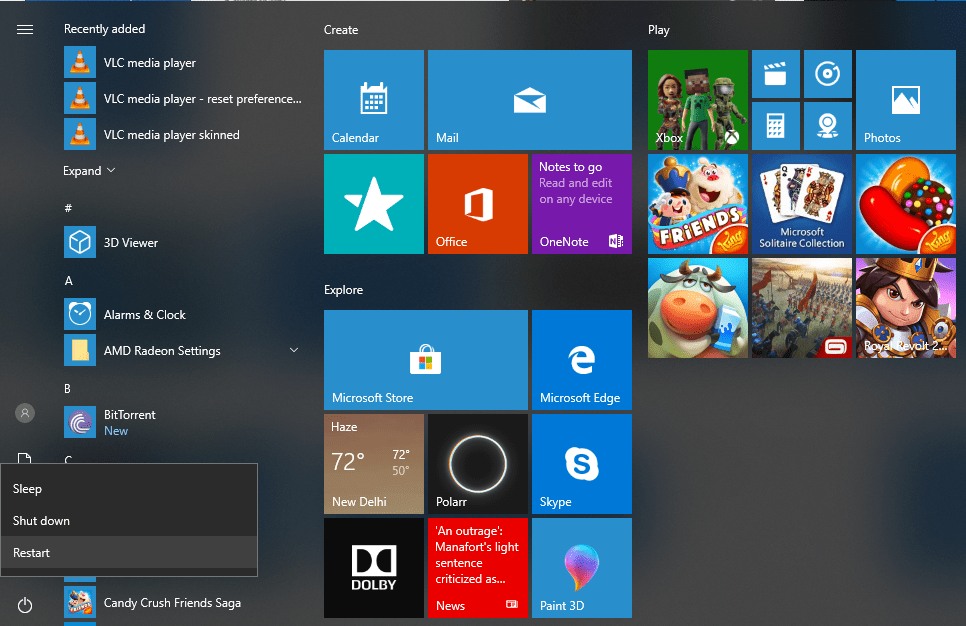
Another easy way to fix the Windows 10 black screen after login error is by simply restarting your system.
Restarting your system will restart any faulty processes, services, or programs that may have caused the error in the first place.
Before you restart your system, make sure to save any work that you were currently doing so that you do not lose the progress after the system restarts.
5. Boot into Safe Mode
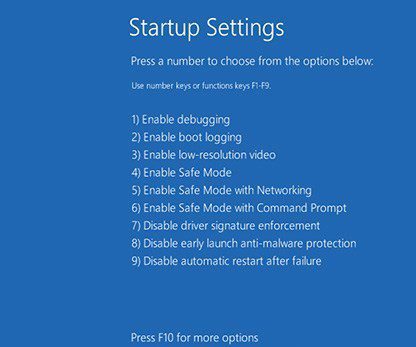
If none of the above methods works, then you can try rebooting your Windows 10 system in safe mode.
If you are wondering what is Safe Mode in Windows, it is a boot mode incorporated within the Windows operating system. When a computer boots in Safe Mode, only the essential programs and services required to run Windows are loaded. This makes it easy to troubleshoot and resolve most of the issues related to the Windows operating system.
If you wish to boot your Windows 10 system into safe mode, all you have to do is follow these steps:
- First of all, power OFF your device.
- Now, press the power button to turn your device ON.
- As soon as you see the Windows logo or manufacturer logo (whichever comes first), press the power button again and turn OFF your device.
- Repeat steps 2 and step 3 two more times.
- The last time your system boots up, do not press any key.
- You will now enter the winRE (Windows Recovery Environment) mode.
- Within the winRE menu, click on “Troubleshoot”.
- Then click on “Advanced Options”.
- Now, click on “Startup Settings”.
- And in the new window that appears, click on the “Restart” button located on the bottom right side of the display.
- After the restart, you will see a list of options Press F5 to select the “Safe Mode with Networking” option.
And that is it. Your system has now successfully booted into Safe Mode.
6. Rollback Display Drivers to the Previous Version
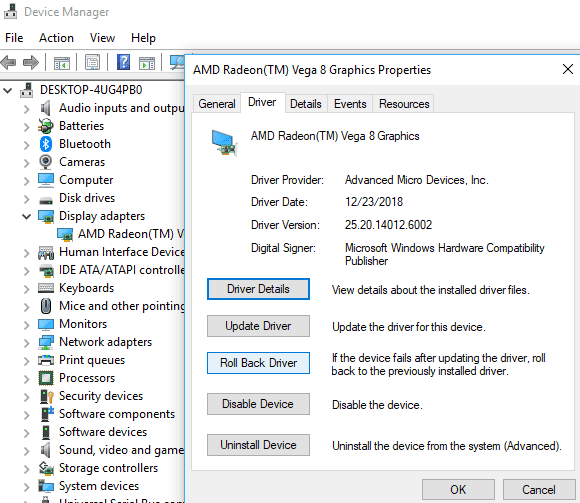
Maybe the latest update of the display drivers installed on your system might be causing the error that you are facing.
Therefore, in order to resolve the error, you can try reverting the display drivers installed on your system to an older version. Below is how you can easily roll back display drivers in Windows 10.
- Press the Windows key + “R” key on your keyboard to launch the Run window.
- When the Run window opens up, type in “devmgmt — Msc” and press Enter.
- The Device Manager window will now open.
- Within the devices listed on the left side of the window, look for “Display Adapters” and expand this option.
- Right-click using your mouse on each driver that appears inside the Display Adapters section.
- From the drop-down menu that now appears, click on “Properties”.
- When the Properties window launches, switch to the “Driver” tab from the top.
- Click on the option that says “Roll Back Driver”.
- Click on “OK”.
And you have now reinstalled an older version of the display driver on your system. Restart your PC and the Windows 10 Black Screen After Login issue should get resolved.
7. Reinstall the Display Drivers
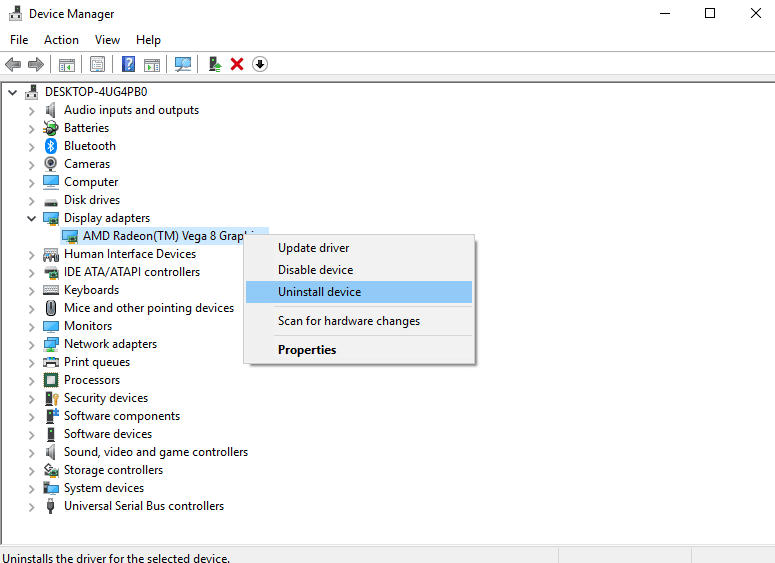
If rolling back display drivers did not resolve the Windows 10 Black Screen after Login issue, then maybe reinstalling the display drivers on your system must help and below is how you can do the same.
- Press the Windows key + “R” key on your keyboard.
- Type in “devmgmt.msc” (without quotes) and press Enter.
- Within the Device Manager window that opens up, find “Display Adapters” and expand the option.
- Find the display driver installed on your device within the expanded Display Adapters option and using your mouse, right-click on the same.
- Click on the option that says “Uninstall Device”.
- In the pop-up box that appears, tick the “Delete the driver software for this device” option and then click on the “Uninstall” button.
- Restart your device.
After uninstalling the display drivers and rebooting your machine, the latest version of the display drivers should be installed on your device which should resolve the issue.
8. Uninstall any Third-Party Antivirus Software
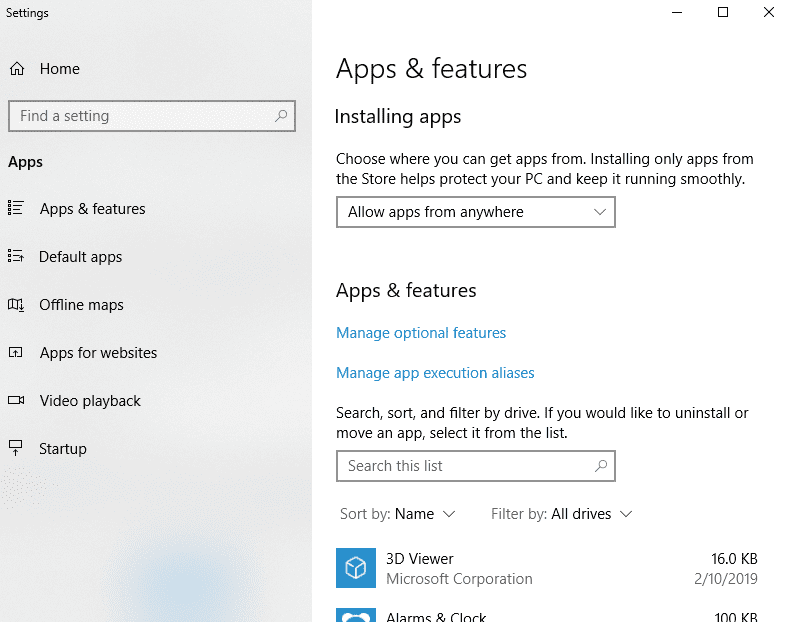
In some cases, even third-party antivirus software that is installed on your Windows 10 system can also cause the Windows 10 Black Screen after Login issue.
To determine whether the antivirus software installed on your system is causing the issue, temporarily uninstall the antivirus software from your system and if the Windows 10 Black Screen after Login issue gets resolved, try installing some other third-party antivirus software.
Apart from antivirus software, if you had recently installed some other third-party software just before the Windows 10 Black Screen after Login issue started appearing, then try uninstalling that software as well.
9. Uninstall any Recent Windows Update
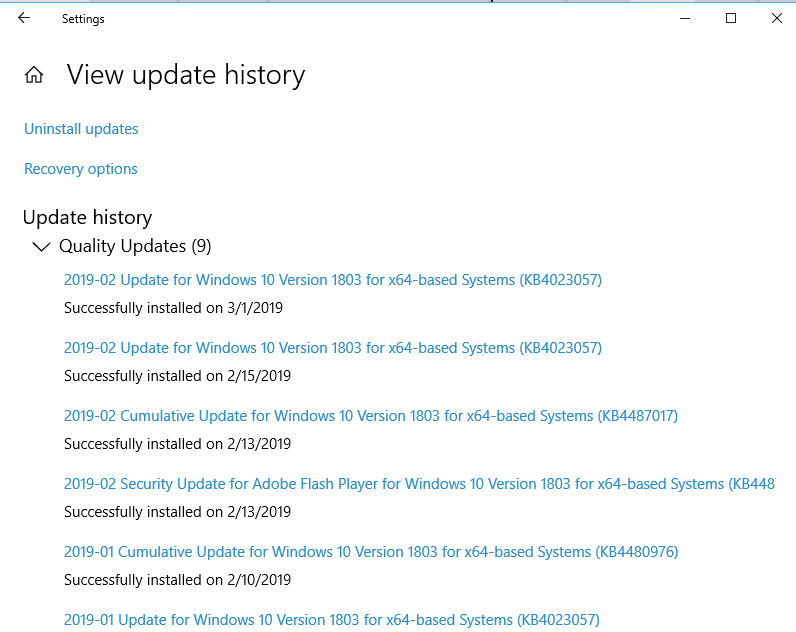
If you had installed any Windows update recently, then you can try uninstalling the same to check whether the Windows 10 Black Screen after Login issue gets resolved.
In order to uninstall the recent Windows update, first, you need to boot your system into Safe Mode by following the steps mentioned in Section 5 above.
After booting into Safe Mode, follow the steps below to uninstall any recent Windows updates that were installed on your system.
- Click on the search bar present in the bottom left side of the taskbar, and search for “Settings”.
- From within the search results, click on the Settings app.
- When the Settings window launches, click on “Update & Security”.
- Now, click on “Windows Update”, and then on “View Your Update History”.
- You then have to click on “Uninstall Updates” and then select the recent update you wish to uninstall from your system.
- Finally, click on the “Uninstall” button.
And now the update(s) you selected will be uninstalled from your Windows 10 device.
Conclusion:
We hope that one of the 9 different ways described above to fix the Windows 10 Black Screen after Login problem was effective for you. So this is all about the Windows 10 Black Screen After Login article guide.
Hope you like this Windows 10 Black Screen After Login from here now. In case your Windows 10 Black Screen After Login issue is still not resolved, do mention details about the problem you are currently facing and the steps you took to resolve the issue in the comment below. We will surely look into it and help you to fix the error you are facing. If you enjoy checking or reading the Windows 10 Black Screen after Login then please do share Windows 10 Black Screen after Login with others as well also.


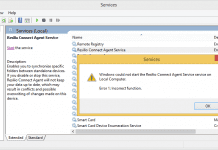




I tried logging into windows and showed an incorrect function.
I tried logging in through safe mode with networking, but again, it said incorrect function. pls help
Every website says the same things, but all the options don’t work. Always says click the Windows Explorer in task manager under processes, but there is no Windows Explorer. Others say, go to safe mode, but it’s just the same black screen. Others say click start, but there is no start, just black. Windows +P, nope nothing. Windows + r, nope nothing, just the black screen with mouse cursor.
I restarted Explorer several times, still no luck 🙁
I’m having a challenge where attempting all the above steps did not resolve the problem. There was an additional user profileand I could log into it without having the same problem.
I created a new account;
transferred data from affected account to new account
removed old account afterwards.
I found out the pressing Ctrl + alt + Del (yes, the three finger salute.) When the Blue screen appears, click on sign out. The Login screen appears and allows you to sign in again. It works just fine from there.
Unfortunately, it doesn’t fix the problem.