If you are one of those who use net use command on their computer system to access the shared resources of a remote computer and if you use the fully qualified domain name (FQDN) of the remote computer then you might have encountered The Network Name Cannot Be Found Windows error. If you are one of those who have got this error, then in this article, we are going to tell you some methods with the help of which you can get rid of this The Network Name Cannot Be Found Windows error.
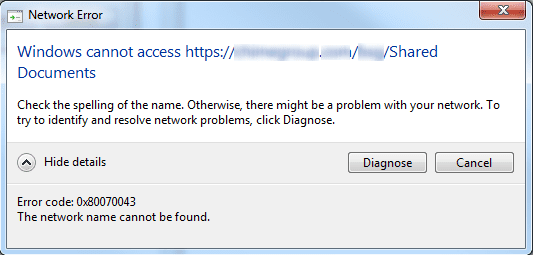
This shows an error code message like,
Causes of The Network Name Cannot Be Found Windows Error:
- Firstly we can say that you can access the shared folders on a remote computer by using IP but not the hostname. If you use the hostname, you may receive this message: “No network provider accepted the given network path.”
- Other than that, if you access the shared folders on a remote computer by using FQDN but not NetBIOS name. But if you do the opposite of it and use the NetBIOS name, you may receive this message: “No network provider accepted the given network path.”
- If you are one of those who use net use to a shared resource of a remote computer, you may receive: System error 67 has occurred. The network name cannot be found windows.
- You can’t map a folder my documents using this command: net use h: \\chicagotech\my documents. If you do, you will receive the above message.
Similar Types of The Network Name Cannot Be Found Windows Error:
- Windows Server 2012 r2
- Java
- 0x80070043
- System.io.ioexception
- windows the network name cannot be found
- Windows Server 2016
- New-psdrive
- Map drive
How to Fix & Solve The Network Name Cannot Be Found Windows Error Issue
We want to make it clear that this The Network Name Cannot Be Found Windows article contains steps that tell you how to modify the registry. We can say that serious problems might occur if you change the registry incorrectly. Because of which we must say that you must make sure that you follow these steps carefully. You must back up the registry before you modify it for some additional protection. Which can help you in restoring the registry if The Network Name Cannot Be Found Windows problem occurs?
1. Increase the Value of the LmhostsTimeout Registry Entry –
You can increase the value of the LmhostsTimeout registry entry to increase the timeout interval of NetBT queries to the lmhosts file and DNS. Other than that, you can also use this The Network Name Cannot Be Found 0x80070043 method to give more time for NetBT questions to resolve the FQDN of the remote computer.
- Click Start
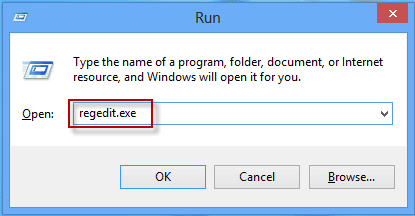
- Click Run, type regedit
- Then click, OK.
- After that in the left pane, you must locate and then click the following registry subkey:
HKEY_LOCAL_MACHINE\SYSTEM\CurrentControlSet\Services\NetBT\Parameters
- In the right pane, double-click LmhostsTimeout.
- You must type a value that is larger than the current value in the Value data box.
- Then click, OK.
*Note: If you do not find the LmhostsTimeout registry entry in Registry Editor, create a new registry entry.
To do this, follow these group policy management The Network Name Cannot Be Found steps:
-
- In the left pane, right-click the Parameters subkey.
- After that point to New.
- Then click DWORD Value.
- Type LmhostsTimeout
- Then press ENTER.
- Double-click LmhostsTimeout, click Decimal.
- During all this, you must make sure that you type a time in milliseconds between 1000 and 4294967295 in the Value data box.
- Click OK.
*Note: The valid hexadecimal base range for the LmhostsTimeout entry is 3E8 to 0xFFFFFFFF.
- Quit Registry Editor.
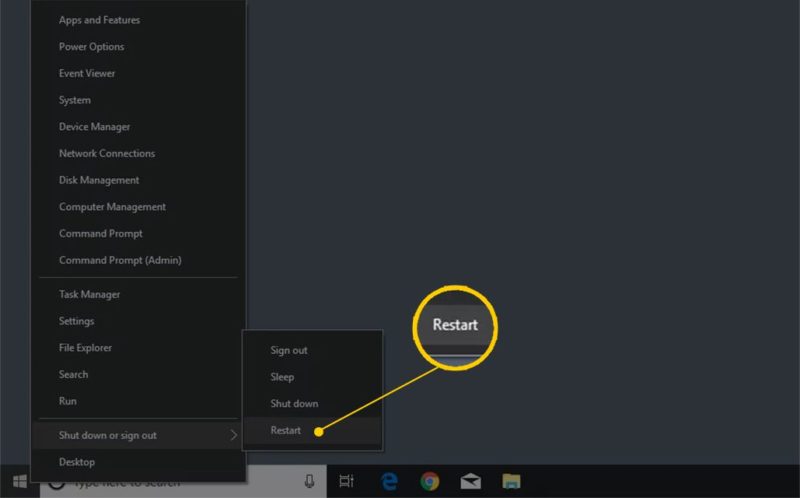
- Restart your computer.
2. Install Internet Protocol Version 6 (IPv6) on the Local Computer –
*Note: To use this group policy The Network Name Cannot Be Found method you must first make sure that one of the following conditions has to be true:
-
- The local system which you are using has to be running on Microsoft Windows Server 2003 or Microsoft Windows XP.
- Other than that, the remote computer with which you want to connect has to be running on Windows Server 2003, Windows XP, or Microsoft Windows 2000.
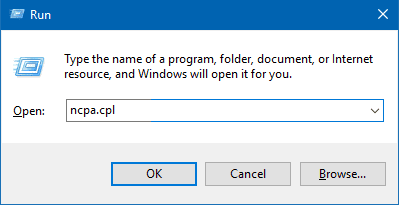
- Click Start
- Click Run, type ncpa.cpl
ncpa.cpl
- Then click, OK.
- After all this, you have to right-click the local area connection, which you want to modify.
- Then click Properties.
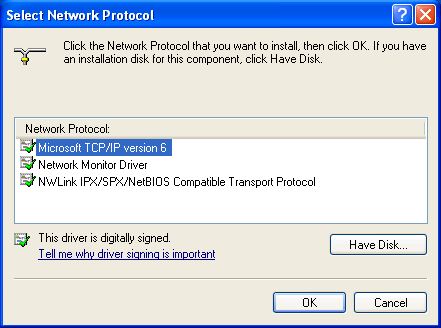
- Click Install.
- Then in the Click, the type of network component you want to install list.
- Click Protocol, and then click Add.
- Click Microsoft TCP/IP version 6.
- Then click, OK.
- Click Close to secure all the changes which you have made to your network connection.
Conclusion:
As we have told this earlier that this The Network Name Cannot Be Found Windows article contains steps that show you how to modify the registry. So we say that you must make sure that you follow these steps carefully, which are told in this article. For added protection, back up the registry before you modify it, and getting rid of The Network Name Cannot Be Found windows error.
In this article, we have told the methods with the help of which you can resolve The Network Name Cannot Be Found windows error, and if it helped you in resolving this error, then we would love to know about it, and you can do that by commenting down below.

