Error Failed to Play Test Tone Windows PC Speakers error can be caused due to corrupted audio drivers, damaged Windows files, and sound configurations. This error appears to a lot of Microsoft’s Windows OS users, and also affects many versions. Having no sound on the computer is something that no one wants to experience.
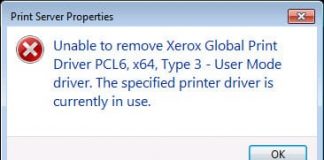
This shows an error code message like,
So let’s look into some solutions right away.
So here is the list of some straightforward guides & tips for you for fixing this type of Error Failed to Play Test Tone Windows PC Speakers error issue from your Windows PC permanently.
How to Fix & Solve Error Failed to Play Test Tone Windows Audio Speakers Issue
1. Restarting Windows Audio Service –
- Press the Windows logo and R key to start the Run dialog box.

- Type services.msc here and then click on the OK button.
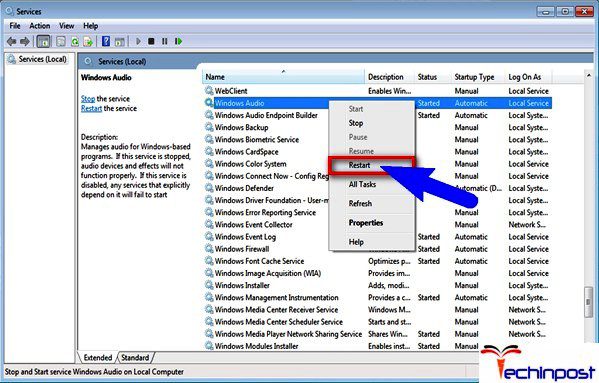
- In the right Services Window, look for Windows Audio in the Name list and then right-click it. Now click Restart in the drop-down menu. This will restart the audio service.
2. Repairing Corrupted Windows Files –
This Speakers Failed to Play Test Tone Windows 10 PC issue occurs if a few necessary files are corrupted. Follow these steps for checking and repairing the corrupted system files:
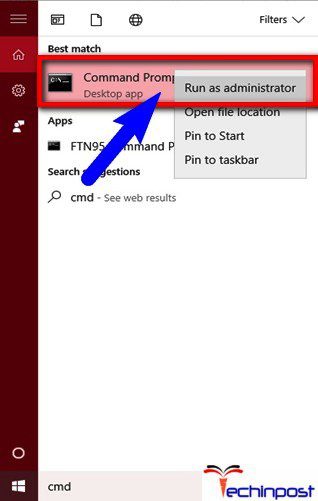
- In the search box type cmd (Command Prompt)
- Right-click on cmd and run it as administrator. When the Command Prompt starts to type sfc /scannow and then press Enter.
This process will take some time until the 100% verification is complete; this might help in solving this Error Failed to Play Test Tone Windows 10 dell error.
3. Changing the Sample Rate –
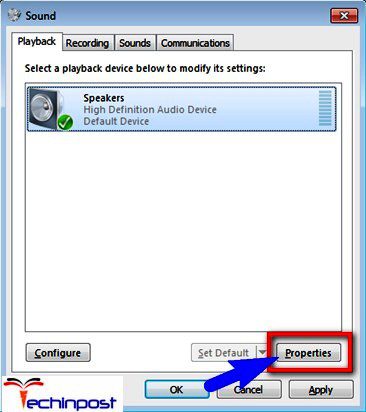
- Right-click on the sound icon situated in the bottom right corner and then select the Playback devices.
- In the Playback tab, select the sound card and then click Properties.
- Click the Advanced tab. The sample rate will be 16 bit, 44100 Hz by default. You can try changing it to other samples such as 16 bit, 48000 Hz, and click on the Apply button and then see if the Error Failed to Play Test Tone Windows 7 64 bit issue is solved.
In case the sample rate isn’t set by default, click on Restore Defaults and then test if the sound is back.
4. Disabling Audio Enhancements –
- Right-click on the audio icon situated in the bottom right corner and then select the Playback devices.
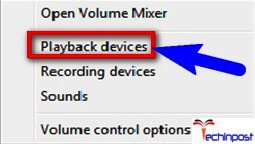
- In the Playback tab, select the sound card and then click Properties.
- Click on the Enhancements tab and check the box beside Disable all enhancements (some Windows version may show Disable all sound effects.’) And then click the Apply button.
5. Reinstalling Audio Drivers –
This Error Failed to Play Test Tone Windows 7 error problem may be the reason for corrupted drivers, so trying to reinstall the Audio drivers can solve the Error Failed to Play Test Tone Windows 8.1 dell PC problem.
- Go to the Device Manager.
- In the Device Manager window, you have to expand the category Sound, video, and game controllers.’ Right-click on the audio device name and then click Uninstall.
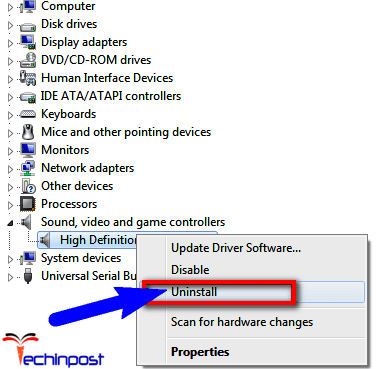
- After the driver is uninstalled, restart the PC, and the Windows will automatically install the generic audio driver. If the Error Failed to Play Test Tone HDMI Windows 7 error stays, download and install the most recent drivers. You will find them on the manufacturer’s website. If you are having a problem with downloading and installing the drivers manually, try using the Driver Easy software to help you.
6. Deleting the KB974571 update (Windows 7) –
A lot of users of Windows 7 reported that the KB974571 update was the reason behind the problem. Just removing it manually solved this Error Failed to Play Test Tone USB headphones Windows 8 problem bringing back the sound.
- Open the Control Panel by searching in the search bar and switch to the Icons. Find the Programs and Features and then open it.
- Inside Programs and Features, you will see a View installed updates link on the top left. Click this link.
- Look for the KB974571 update and then click Select the Uninstall from the toolbar to remove it. You may need to restart the computer before this process ends, and so make sure that you save your work. Now, wait for this process to complete.
7. Adding the Local Service in the Local Users & Groups –
This Error Failed to Play Test Tone Windows 10 HDMI issue may seem to be entirely different from the audio problem, but in fact, it helped a lot of users.
- Right-click on This PC or My Computer based on the Windows version you are using, and then select Manage from the drop-down menu.
- On the right, you can see a System Tools Double click on Local Users and Groups, and then select Groups below it.
- Right-click on Administrators from the list in the window, and then select Add to group from drop-down menu.
- Click on Add >Advanced > Find Now. Double click on Local Service, and then click. You will see the NT Authority \ Local Service in this list and click OK. Now close the Computer Management window and then reboot your PC. The problem should be solved.
As mentioned above, the absence of sound on your device is a big deal. Fortunately, there are various possible fixes for this type of Error Failed to Play Test Tone Windows 10 PC Speakers problem, and all have reported working for several users. Thus you can surely fix your Error Failed to Play Test Tone audio problem if you follow the above methods.
& if you are getting or facing any error issue while trying these Error Failed to Play Test Tone Windows 10 PC Speakers solutions from here, then Comment down that problem here in the below comment section or directly mail it.



Tried almost all steps except the windows 7 one (on a Windows 10 machine).
Still not working.
1. Restarting Windows Audio Service – This did nothing.
2. Repairing Corrupted Windows Files – SFC found no errors.
3. Changing the Sample Rate – There’s only 16bit 48000 Hz and 24bit 48000 Hz sample rates. It defaults to the 24bit one and if I try to change it I get a prompt saying that “the format is not supported by the device”.
4. Disabling Audio Enhancements – This tab is not available.
5. Reinstalling Audio Drivers – Tried uninstalling drivers then reinstalling both from windows update and the device manufacturers website. No luck.
6. Deleting the KB974571 update (Windows 7) – Running Windows 10, so this probably won’t help. Didn’t do this step.
7. Adding the Local Service in the Local Users & Groups – didn’t solve it either.
Any other tips?