If you accidentally synced your PC photos to your IOS or If you take a lot of pictures and if your iPhone or your iPad is running out of space, and you want to keep happy from taking up a lot of memory and not aware of about How to Delete Synced Photos from iPhone than for to do so you must have to read and check out this below blog post once thoroughly,
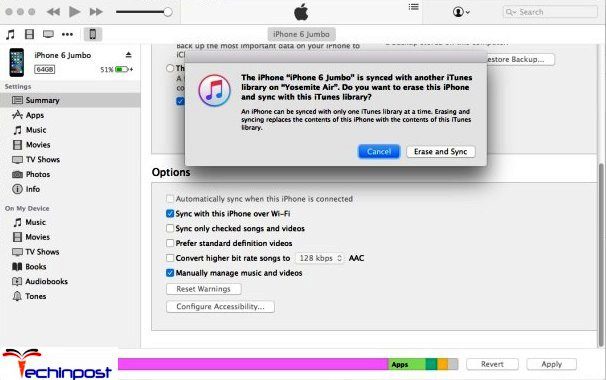
If a photo album appeared on your iPhone after syncing with the iTunes on your PC, then you may not be able to delete the album.
“Facebook photo syncing allows you to save the photos to the Facebook account from your Smartphone Device, but Facebook also recently revealed that it would remove all the synced photos from its application soon.”
iPhone, which is the world’s most powerful personal device. iPhone gives you the ability to take the digital photos with the device’s built-in camera & includes the option to delete these pictures manually. You can also delete images you synced from iTunes by synchronizing them with the new folder. But you were unable to remove the photos coming from the sync. For some reason, IOS does not allow you to delete the pictures or the albums in them if they are synced with iTunes.
You have two types of the photo album on your iPad, and one is the album created on your iPad, and another one is album synced from your PC through your iTunes. So today, here in this How to Delete Synced Photos from iPhone without iTunes post, we will introduce you to some fundamental best techniques to help you to Delete Synced Photos from iPhone.
(Guide) How to Delete Synced Photos from iPhone Device
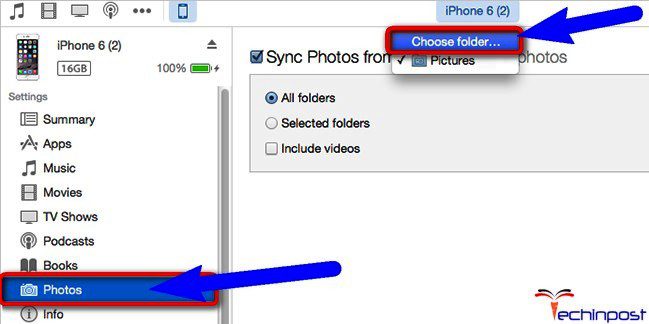
1. Remove all the Synced Photos by Syncing with New Folder –
- Create a folder on your PC
- Add only one photo to a new folder or leave it empty
- Open iTunes there
- Go to your iPhone, iPod touch or iPad
- Click on the Photos option there
- Choose the folder created at first step to sync photos from
- Click on the Apply button there to apply
- Unchecked the ‘Sync Photos from‘ option
- Now, Apply again
- Sync the iPhone there
- After completing, close all the tabs there
- That’s it, done
By removing all Synced Photos by Syncing with the New, Folder can help you with How to Delete Synced Photos from iPhone.
The simplest method to quickly delete synced photos from iPhone, without any further data loss, is to use a little tool called dr.fone iOS System Recovery.
The reason I recommend dr.fone is because it’s an application introduced by Wondershare Technologies, one of the world’s most reliable tech companies, one which has even received critical acclaim from renowned outlets like Forbes and Deloitte. And finally, as mentioned earlier, this is one of the few methods that doesn’t cause complete data loss.
How to Delete Synced Pictures from iPhone with dr.fone iOS System Recovery
Step 1: Connect & Launch –
Launch the dr.fone application and choose System Recovery.
Connect your iPhone to the computer with a USB cable, and then wait for it to be detected. Once that happens, click on Start.
Step 2: Boot iPhone using DFU Mode –
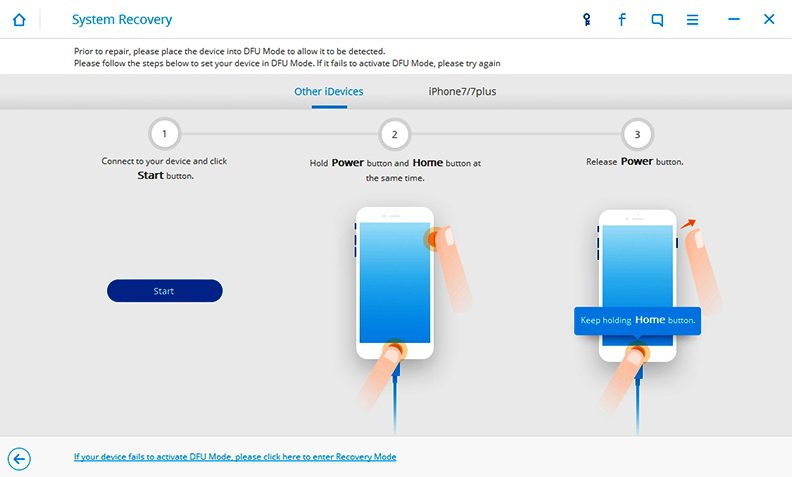
You can only delete synced photos from iPhone is your device is in DFU mode first. This is how you put it on DFU mode:
- Hold Home and Power for 10 seconds.
- Release the Power button but continue holding Home.
- Fone will eventually detect the DFU mode.
- Release Home Button.
Step 3: Download & Install Latest Firmware –
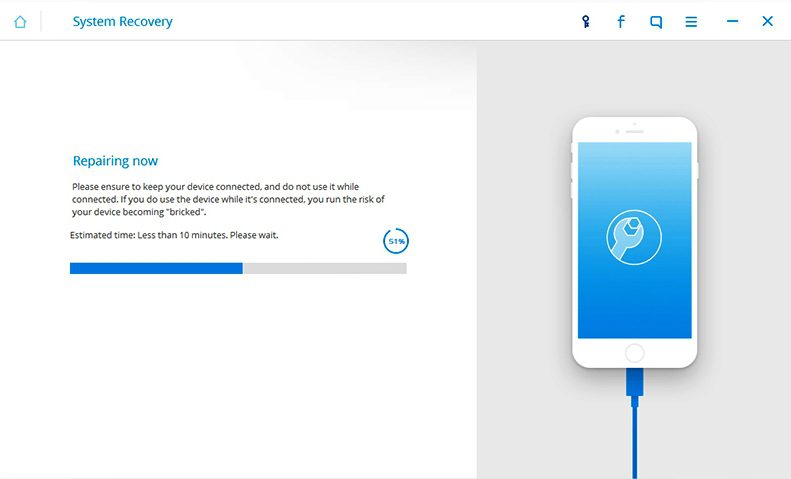
Select your iPhone model and firmware information. dr.fone will automatically detect the latest firmware. Click download and allow dr.fone to do the rest. Once the download is complete, it will start installing the firmware, thus deleting synced photos from iPhone.
Step 4: Restart iPhone –
Now you need to restart the iPhone simply, and you’ll find that it has been cleared of all the synced photos.
In 4 short steps, you can delete synced photos from iPhone using dr.fone iOS System Recovery.
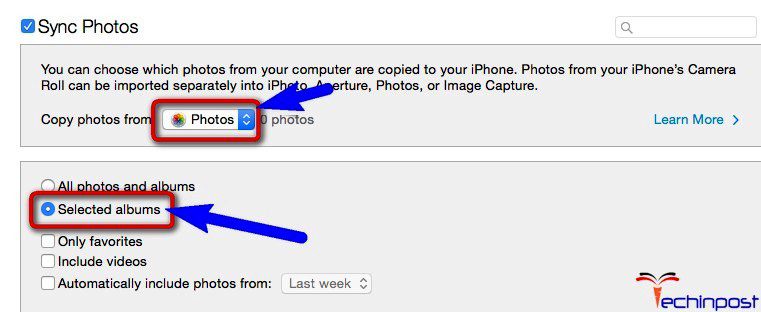
2. Delete iPhone Synced Photos by Syncing No Pictures –
- Open iTunes there
- Connect with your iDevice
- Click on the Device button there
- Under photos, Choose Sync Photos option
- Select the ‘Copy Photo from – Photos‘ option there
- Check the ‘Selected Albums.’
But do not select any albums there
Make sure there are no photos you choose - Now, click on the Apply option there to apply
- After completing, close all the tabs there
- That’s it, done
By Deleting the iPhone Synced Photos by Syncing, No Pictures can help you with How to Delete Synced Photos from iPhone problem.
3. Selectively Delete Synced Photos from iPad or iPhone without iTunes –
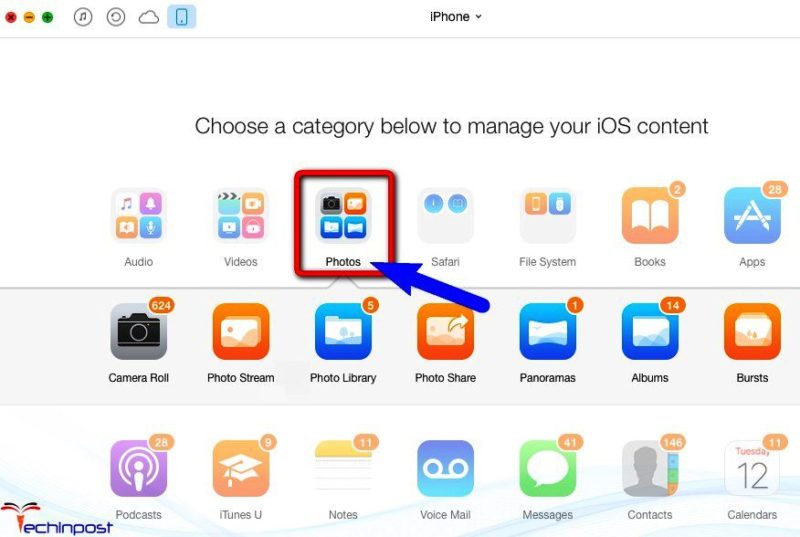
- Install and Run AnyTrans on your MAC or PC
- Connect the device to your PC by using the USB cable
- Click on the Photos option
- Choose Photo Library from there
- Preview the synced Photos
- Select the photos you don’t want & delete them by clicking ‘Delete.’
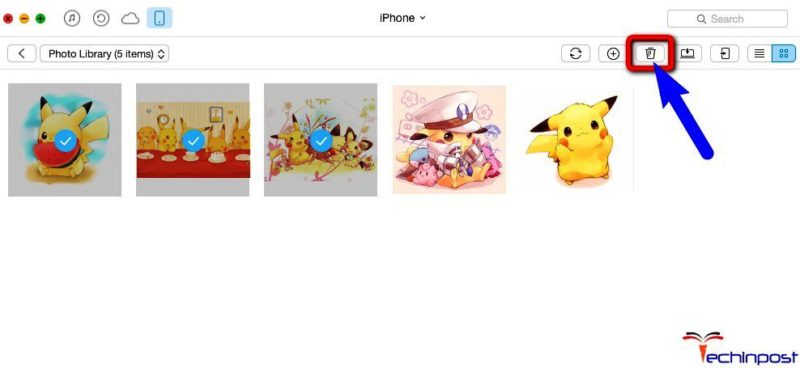
- That’s it, and now it can delete all the photos
- After completing, close all the tabs
- That’s it, done
Selectively Delete Synced Photos from iPhone or iPad without the iTunes can fix this How to Delete Synced Photos from iPhone issue.
4. Synced Photos Deleting must be done through iTunes (Optional) –
- In the iTunes, Select the Device icon in Devices list (On the left)
- Click on the Photos option in the Window
- Choose the Sync Photos from option
Being Aperture or iPhoto on MAC
Photoshop Elements or Photoshop Album on Windows PC - Choose Select Albums & deselect the collections or albums you want to delete
- Now, click on the Apply option to apply it
- After completing, close all the tabs
- That’s it, done
Synced Photos Deleting must be done through iTunes can help you to get rid of this type of issue.
So here are some quick ways and the tips and tricks for How to Delete Synced Photos from iPhone quickly and get rid out of this type of problem from your PC and your Device too.
If you like this blog post or having some suggestions regarding this website or this post, then you are most welcome here. So for that, Comment down here below.
And if you are also facing any error problem while trying these above steps for How to Delete Synced Photos from iPhone issue, then you can comment down here below or directly email us. (You can do any procedure as you like)
